How to Hide in The Ditch Hotel
Master linen lockers, breath control, and smart fight-or-flight calls.
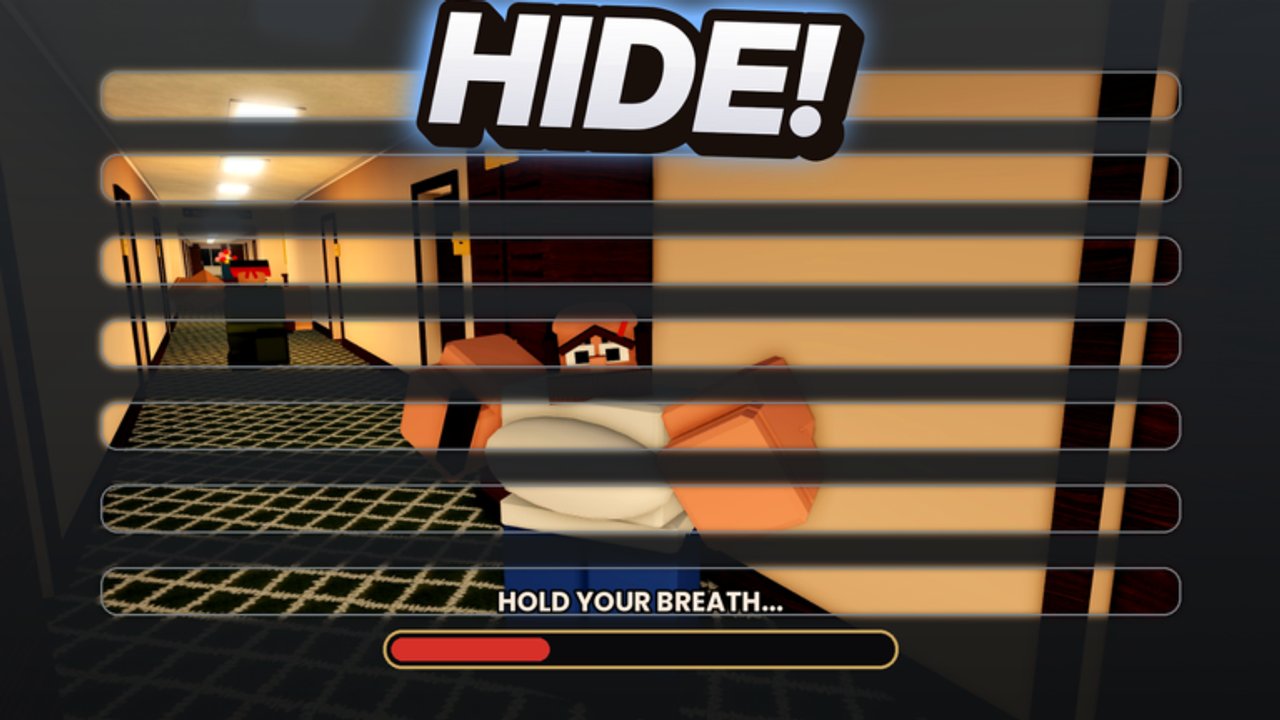
Hiding is the skill that separates panicked runners from consistent escapers in The Ditch Hotel. You will not outrun every chaser forever—Grandma in a tight hall, BIG EARL with heavy firepower, The Tall Man on a long sightline, or Principal answering noise on Ditchwood Middle School will eventually win a pure sprint. Linen lockers, breath control, and line-of-sight breaks exist so you can reset chases and finish door goals. This guide teaches when to hide, how to hide well, and when running is the better call. Start from Getting Started if the core loop is still new.
Linen lockers are your default tool
Linen lockers (closets) are scattered through the Hotel, Neighborhood interiors, and School floors. Before every knock, spot the nearest locker the same way shooters pre-aim cover. A knock without a hide plan is a coin flip. After the knock resolves, move immediately toward that locker if audio or footsteps spike. Enter cleanly—clipping the doorway while turning camera wildly wastes the second that saves you.
Closet Hide upgrades toward Level 10 and Gift Shop 2x Closet Hide make locker stays more forgiving. Buy them as Cash allows, especially before Hard and above. Farming routes in How to Get Cash and free Cash from Codes fund those upgrades faster than pure door grinding.
Hold breath and stay disciplined
Once inside, follow the game’s hold-breath requirement. Treat breath control as part of the hide, not an optional flourish. Leaving early because you are impatient is a top cause of instant re-catches. Wait for audio cues to fade and for visual confirmation that the chaser passed your lane. If the UI or animation indicates you must keep holding, do not mash movement keys.
While hidden, keep your camera ready for the exit direction you planned—usually toward the next door cluster or toward stairs if your door goal is complete. Escape routing details live in How to Escape. Hiding is not AFK time; it is a short tactical pause.
Break line of sight on the way in
Chasers that still see you as you enter may check the locker or linger. Approach from angles that put walls between you and the threat. Use corners, stair wells, and furniture blocks. If you are already in open view at close range, a locker three meters away may be a trap—sprint to a farther closet around a corner instead of diving into the obvious box they are staring at.
Neighborhood party houses complicate this: a whole party can chase after a five-times Cash knock, so multiple sightlines cover the room. Pre-plan two exits—one locker inside, one path out of the house entirely. School hallways are long; break sight around corners before committing to a closet in the middle of a straight corridor.
When to hide vs when to run
Hide when:
- A chaser is close enough that a straight sprint will lose.
- You still need door knocks and a short reset lets you stay in a rich wing.
- Stairs are contested and you need the chase to pass.
- Your stamina bar is too low to reach the next safe room.
Run when:
- The locker is already compromised or clearly camped.
- You have a full stamina bar, a straight shot to stairs, and the door goal is done.
- Multiple chasers or a party wipe make one closet insufficient.
- Noise responses (SECURITY / POLICE / PRINCIPAL) are bearing down and the locker sits in their path.
Wrong calls go both ways. Hiding every time trains campers to wait on your door. Running every time empties stamina and dies in open halls. Alternate based on distance, stamina, and goal progress. Tips and Tricks lists short habits that reinforce these calls under stress.
Map-specific hide notes
Hotel — Classic layout with readable locker density. Learn one wing thoroughly so every knock has a named closet in your head. Watch for BIG EARL and gun-using threats that punish long exposed approaches.
Neighborhood — Houses vary. Party houses pay more but spawn chaotic multi-chaser moments. Prefer lockers that are not in the main party room if you can reach them without crossing the entire dance floor. Normal houses are better mid-goal when you only need safe progress.
Ditchwood Middle School — Three floors mean you must know closets per floor. TEST IN PROGRESS rooms are Cash magnets; clear them early, then hide-reset before loud rotations upstairs. Keep noise down near the end so Principal does not erase a good run. See Maps for layout context.
Upgrades and Gift Shop synergy
Closet Hide leveling is the direct hide investment. Stamina leveling supports the run-away half of the decision tree. 2x Closet Hide and 2x Stamina from the Gift Shop are the usual pair for players who die in last-hallway chases. 2x Speed helps you reach lockers sooner after knocks. VIP is optional; mastery matters more than a badge.
Knock styles from the Knock Shop can create space or noise. Quiet, reliable knocks pair better with hide-focused play when you are one door from escaping. Flashy styles are fine early in a farm when you accept chase risk. Check the Tier List for style and chaser context once you leave pure beginner mode.
Practice drills (five runs)
- Locker-first Easy Hotel — Every knock must start with a named locker target. Abort knocks that have no hide plan.
- Breath patience — Intentionally stay hidden longer than feels comfortable; leave only on clear audio.
- Camped locker recovery — When a chaser lingers, practice pathing to a second closet instead of suicide exiting.
- Post-goal hides — Complete the door goal, then force at least one hide before stairs to simulate contested exits.
- School quiet clear — On Easy or Hard School, finish a run prioritizing low noise and planned floor closets.
Co-op hiding
In a four-player elevator party, do not stack four people into one obvious locker if the map offers spreads. Call “hiding left wing” so teammates do not lead chasers to your door. Shared Cash is nice; shared stealth is nicer. Phone filming and jumpscares are fun between attempts—pause the memes while someone is mid-hide. More co-op structure is in Play with Friends.
Mistakes to delete from your muscle memory
- Knocking while staring at the door instead of pre-turning toward the locker.
- Exiting a locker into the chaser’s face because you heard one second of silence.
- Using the same hallway closet every time so experienced chasers predict you.
- Spending all stamina before a hide so you cannot relocate if camped.
- Ignoring Closet Hide upgrades while buying joke knock styles.
Delete those habits and hiding becomes calm. Calm hides feed clean escapes. Clean escapes fund better upgrades. That loop—more than any single secret room—is how you climb from Easy survivors to Difficult and IMPOSSIBLE clears in The Ditch Hotel.
Frequently Asked Questions
Quick answers about codes, knocks, lockers, and escapes in The Ditch Hotel.
How do linen lockers work in The Ditch Hotel?
Enter a linen locker to break the chase, hold breath as required, wait until the chaser passes, then leave toward your next door or the stairs.
Should I always hide when I hear a chaser?
Hide when they are close, your stamina is low, or stairs are contested. Run when the locker is camped, your goal is done with a clear path, or one closet cannot cover a party chase.
What upgrades help hiding the most?
Closet Hide toward Level 10 and Gift Shop 2x Closet Hide, supported by Stamina upgrades so you can relocate if a locker is camped.
Is hiding different on Ditchwood Middle School?
Yes. Learn closets per floor, farm TEST IN PROGRESS rooms early, and keep noise down near the end to avoid Principal ending the run.
Can friends hide together?
Yes, but avoid stuffing the whole elevator party into one obvious locker—spread out, call locations, and save jumpscare filming for between attempts.